7 ways to improve your kitchen, without remodeling (12 Days of Staging – Day 2)

It’s true – when showing a home, the kitchen is almost always the showstopper. And it makes sense – it’s both the most functional room in the house, and the one people tend to gather in. The kitchen has a lot going on. And because of the function, form, and durability that must be built into a kitchen, a traditional remodel or renovation is a financial investment. According to a study by homeadvisor.com, the 2017 average cost of a kitchen remodel was $22,000, with most homeowners spending at least $12,000 and many spending over $30,000 (for custom work, it’s very easy to exceed this range).
But what if you’re just looking for a little change of scenery, or a slight refresh? The good news is that you don’t have to commit to demolition or a major splurge. You can still give your kitchen’s look and feel a little lift on a small, low-commitment budget.
The following tips are recommendations we give to seller clients; but really, they’re great for anyone looking for a little refresh. So whether you’re getting your home ready for an upcoming sale, prepping for holiday guests, or just looking to spice up your day-to-day atmosphere, here are seven ways you can bring a new form of creativity to the kitchen:
1. Deep clean – that means from top to bottom. After vacuuming the floor and washing all solid surfaces, detail your oven/stove like you’d detail a car: replace dirty drip pans under burners, polish the knobs, search YouTube for the best way to get your oven glass clear, or how to clean any unique features such as cast-iron grills. In general, the goal is to make it look brand new (even if it’s an ‘80s model). Repeat this process for all your kitchen appliances (if you can’t get through all of them in just one day, that’s ok! Take it one appliance at a time). Dust everything, including ceiling fans and light fixtures; and then break out the Windex (or other appropriate surface cleaners) to give everything a final shine.
2. Declutter your surfaces – This is especially important if you’re staging your house for photographs. Everything looks more cluttered in photos; so in that case, we recommend clearing everything from your countertops except for a few pops of color/visual interest. These could include a bowl of fresh fruit, a colorful cookbook on a stand, or a sweet, minimal coffee station to set the stage. Put away magnets, notes, and pictures attached to the refrigerator.
3. Organize your pantry and your cabinets – If you’re selling, trust us – buyers will open them all. Show them how much functional storage space you have by clearing out anything you’re not using. For staging purposes, pantries should contain minimal amounts of neatly-arranged items, and junk drawer items should be relegated to a covered box. Even for day-to-day living, it’s always nice go through this process, just to remind yourself of what you have on hand (and take note of where to find it).
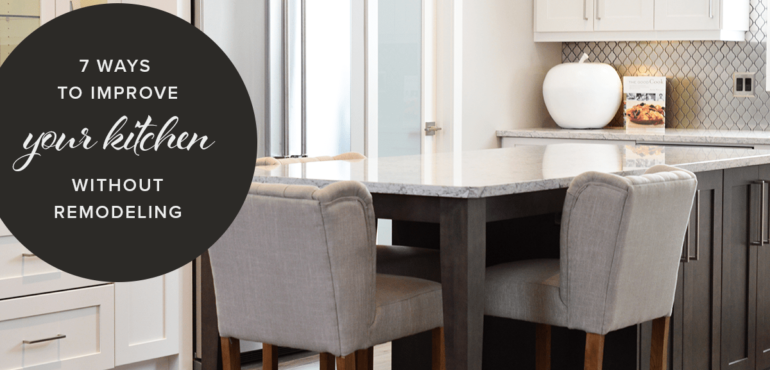
4. Add an eat-in option – If your kitchen is large enough, adding some seating can make it more inviting and functional. This could take the form of a space-saving high-top table, a portable island/bar with seating, or stools to tuck under a countertop if your kitchen design allows. For showings, set the table as though you’re hosting a dinner party – it’ll show buyers what the space could look like at its festive best.
5. Breathe new life into the air – Live plants or flowers give a space color, vibrance, a sweet scent, and even the benefit of cleaner air. And speaking of scents, if you’re selling, avoid cooking dinners with aromas that linger. People have different tastes (and taste aversions), and the smell of certain foods could turn a buyer completely off. That said, the smell of baked goods almost always has a positive effect – so go ahead and bake an apple pie or chocolate chip cookies before a showing – just be sure to clean up the mess!
6. Transform it with lighting – At a minimum, replace any burned-out lightbulbs. For added function, you can install undermount cabinet lights to illuminate your prep work (if you’d rather not hard-wire, there are some battery-operated options), and pay close attention to tone. For staging, we recommend softer, more inviting golden-hued bulbs (incandescent or LED) as opposed to blue or green tinged fluorescents (this goes for every light in your house). And during the day, opening your curtains or shades all the way up to maximize natural light can make a huge difference, too.
7. Add some low-commitment modern touches – new knobs can give your cabinets an updated look without the long-term commitment. And if there’s a trend or color you love, but you’re not sure it will last, try incorporating it with kitchen towels, artwork, decorative platters, or table settings rather than long-term commitments like paint, wallpaper, or solid surfaces. And for the cost of materials, and an electrician or qualified handyman’s time, artistic lighting fixtures can become a focal point, even during the day.
Was this helpful? If so, check out Marie’s other tips in this series, and follow future posts by subscribing below!